
One of the limitations of Apple phones is that they don’t allow you to change quite as much of your screen’s layout as is possible on Android, offering less customisation to users. But with bigger screen sizes over the years, we’ve gained access to more real estate on the home screen. The iPhone 3GS, for example, could fit 20 apps on the home screen, whereas the largest iPhone XS Max, released last year, can hold 28.
Still, for some people that won’t be enough. Once you’ve downloaded all your personal applications, like online banking, email, social media, and so on, you’ll already be running near capacity. This means having apps spread across multiple screens, which can soon makes things difficult to track down. And you’ll notice that over the months and years after buying your phone, you tend to accumulate a lot of applications that make your screen cluttered.
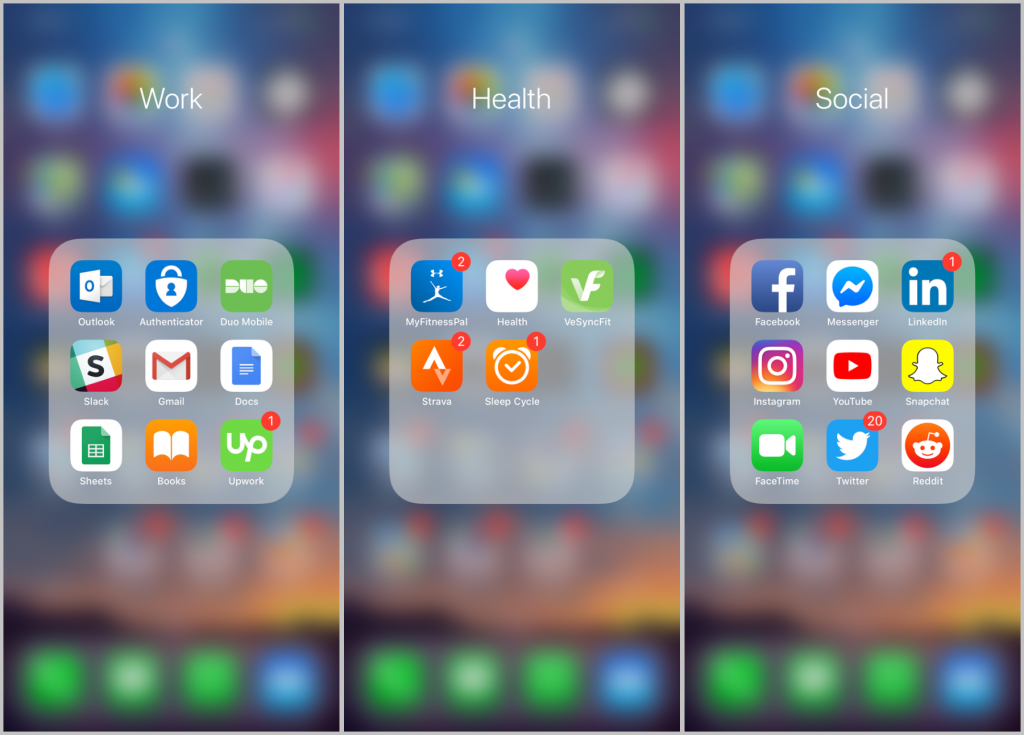
One way to combat this is by creating folders on your iPhone, a feature that isn’t immediately obvious if you’re new to Apple’s products. Folders group together applications and can be given names that suit. So, you could group together Twitter, Facebook, and Instagram, and name the folder ‘Social Media’.
As the process isn’t really highlighted anywhere on the setup wizard, it can be easy to miss. But once you know how to create folders, you can probably place all your most-used applications in an easily-accessible place on the main home screen.
How to group applications together
Step 1:
When you want to create a new folder, you’ll need a minimum of 2 apps to get things started. Decide what you’d like to group together first, like finance-related applications, social media apps, or health and wellbeing software.
Step 2:
Long-press on one of the chosen applications (press and hold the app icon) until all apps on your screen begin to shake. This is the same thing you’d do to move applications around. If you’re using a newer iPhone, don’t press too hard or you’ll activate ‘Force Touch’.
Step 3:
Now drag your chosen application directly on top of one of the other apps that you want to group together. When you hover the icons over one another, you’ll see that they appear to merge together. When you release the icon, it will group them into a small folder.
Step 4:
Depending on your version of iOS (the iPhone / iPad operating system software), you’ll see something a little different here. If you’re running iOS 7 or above — which you really should be as a minimum — then your new folder will show in the full screen view. The display is different in lower versions of iOS, but only those still using a very old iPhone will be on such a low version of iOS.
Step 5:
If you open the folder, you’ll see a placeholder name at the top of the screen. Tap on this name and you’ll be allowed to use your keyboard to rename the folder.
The iPhone is a smart bit of kit and will automatically assign names. Unlike Windows, which creates folders under the default ‘New Folder’ name, the iPhone will identify what apps you’re grouping together and try to assign a relevant name. For example, if you group a bunch of game apps into a folder, your phone should recognise and name the folder ‘Games’.
Adding other applications to the same folder is as simple as repeating the same process and dragging the new applications over the top of the folder you’ve just created. Once you’re done, you can remove apps by dragging them outside of the folder view, and if you remove all apps from a folder, it’ll be deleted.
And it’s as simple as that. For other useful iPhone OS tips, get in touch with WiseGuys on 0808 123 2820, or check out the rest of our knowledge base.

Recent Comments